Quick Guide for Cursive Instruction
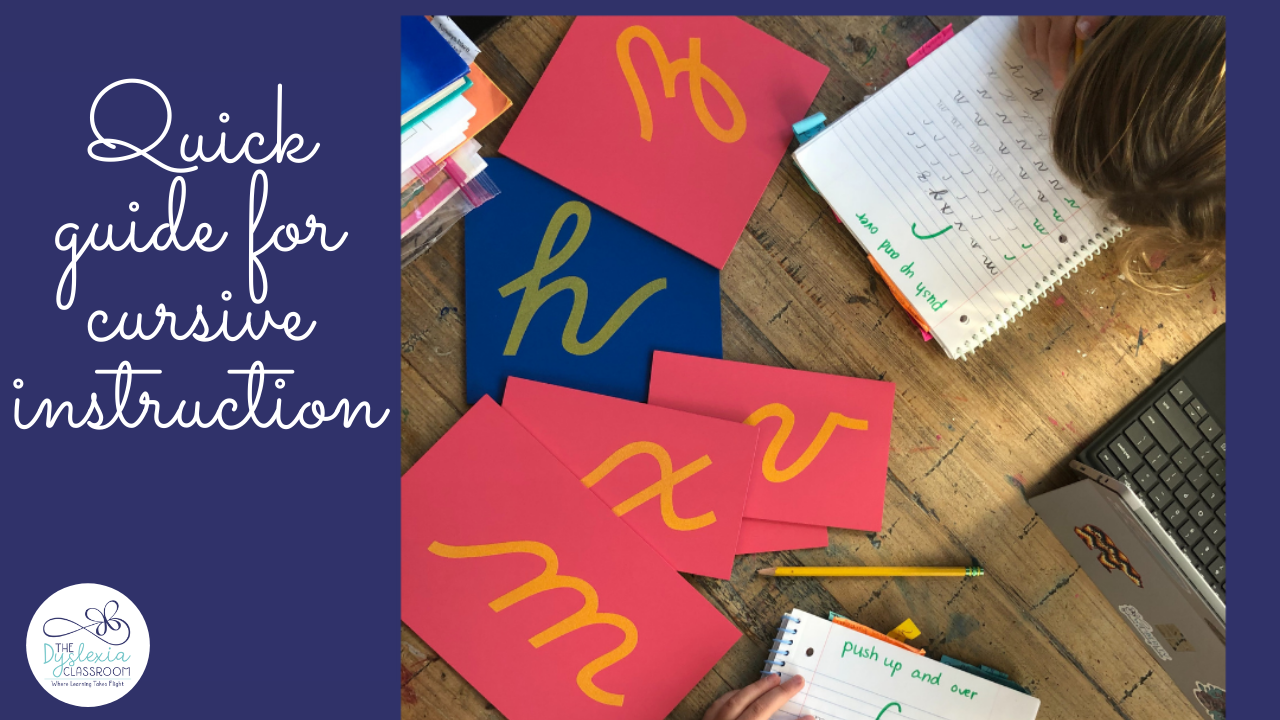
Hi, friends. Recently, we chatted about the importance of understanding the four parts of a letter, including letter formation in print. This week, we will dive into cursive, which is always a favorite with students!
Summer is a great time for handwriting practice. Explicitly teaching letter formation is a crucial part for automaticity in writing. Handwriting instruction should lead in the early grades and provide ample opportunities to practice explicitly taught letters. Further in this post, I explore some ways you can do this in your practice.
Why is handwriting so important?
We know that the knowledge of letter names and fluency of letter naming in kindergarten are among the best predictors of later reading success (Catts et al., 2015). Handwriting helps students store letters as linguistic symbols. 📝 When students have the precise motor sequence for forming each letter, it is automated and recalled without conscious effort. This automaticity leaves mental energy for the written composition of writing. Many students who struggle with automatic letter writing will also struggle with putting thoughts onto paper because their energy is expended on forming letters instead of content.
When we specifically teach students to write individual letters, students are introduced to:
⭐️ prewriting motor skills
⭐️ language for direction (the 4 approach strokes)
⭐️ verbal descriptions
⭐️ verbal coaching and cueing for proper letter formation
⭐️ model letters with the correct formation indicated with arrows
⭐️ and provided ample opportunities for practice
When kindergarten students are taught explicit letter formation linked to the concept that letters represent speech sounds, syllables, and words, these images are stored in the brain's language center (Beringer & Wolf, 2015).
I advocate that we ensure our earliest learners are presented with the necessary skills and language to create these stored linguistic symbols that lead to automaticity in writing in order to move to the core complex skills that writing demands. What are your thoughts? There is a great deal that goes into teaching handwriting on both the teacher and the students, but the benefits make it necessary for classroom instruction.
Do you explicitly teach handwriting to your students? Are you struggling with this? Comment below. I'd love to help you with this!
Whether you choose to work on print or cursive, providing explicit instruction and ample practice is critical for creating the necessary muscle memory to build letter formations. Cursive instruction has gotten more attention over the last few years and with good reason! Research also shows that there are considerable benefits to teaching cursive. Let's look at some of those benefits.
Top Benefits of Teaching Cursive
Cursive activates different neurological pathways than typing or printing.
Researchers have found that instruction in cursive stimulates brain synapses across the left and right hemispheres. According to Dr. Virginia Berlinger, professor of psychology at the University of Washington, "When we write by hand, we have to execute sequential strokes to form a letter-something that brain scans shows activate the regions involved in thinking, language, and working memory. Cursive accelerates the benefits."
Promotes flow of thoughts and words.
Cursive writing consists of fluid movement from letter to letter within a word. This fluidity improves writing speed and allows more efficiency when writing, freeing up cognitive desk space. The automaticity of writing may enable one's thoughts to be put down on paper quicker than print. I have found that cursive can assist with the fluidity of writing and can be helpful with eliminating reversals. Have you also found this to be true in your experiences?
Cursive instruction may improve language fluency for students with dyslexia and dysgraphia.
There are only four approach strokes for cursive, whereas print has several different starting points. Many children in the early stages of writing confuse certain letters in print, such as b, d, and p. One of the benefits of cursive is that none of these letters, which are often confused, begin with the same approach stroke.

Multi-sensory techniques
Multi-sensory techniques incorporate two or more modalities, such as seeing, listening, and feeling. This visual-auditory-kinestetic connection builds the neuropathways in the brain. Stanislas Dehaene, psychologist at the Collège de France in Paris, notes:
When we write, a unique neural circuit is automatically activated. There is a core recognition of the gesture in the written word, a sort of recognition by mental simulation in your brain. And it seems that this circuit is contributing in unique ways we didn't realize. Learning is made easier.
I teach cursive to all of my students using multi-sensory techniques such as writing in sand trays, introducing one letter at a time linking it to sound, focusing on the approach stroke, and begin by using the same wording as a key. Learning letter formation develops both hand movement (graphomotor) and letter recognition (orthographic) skills. Now, let's look at some strategies.
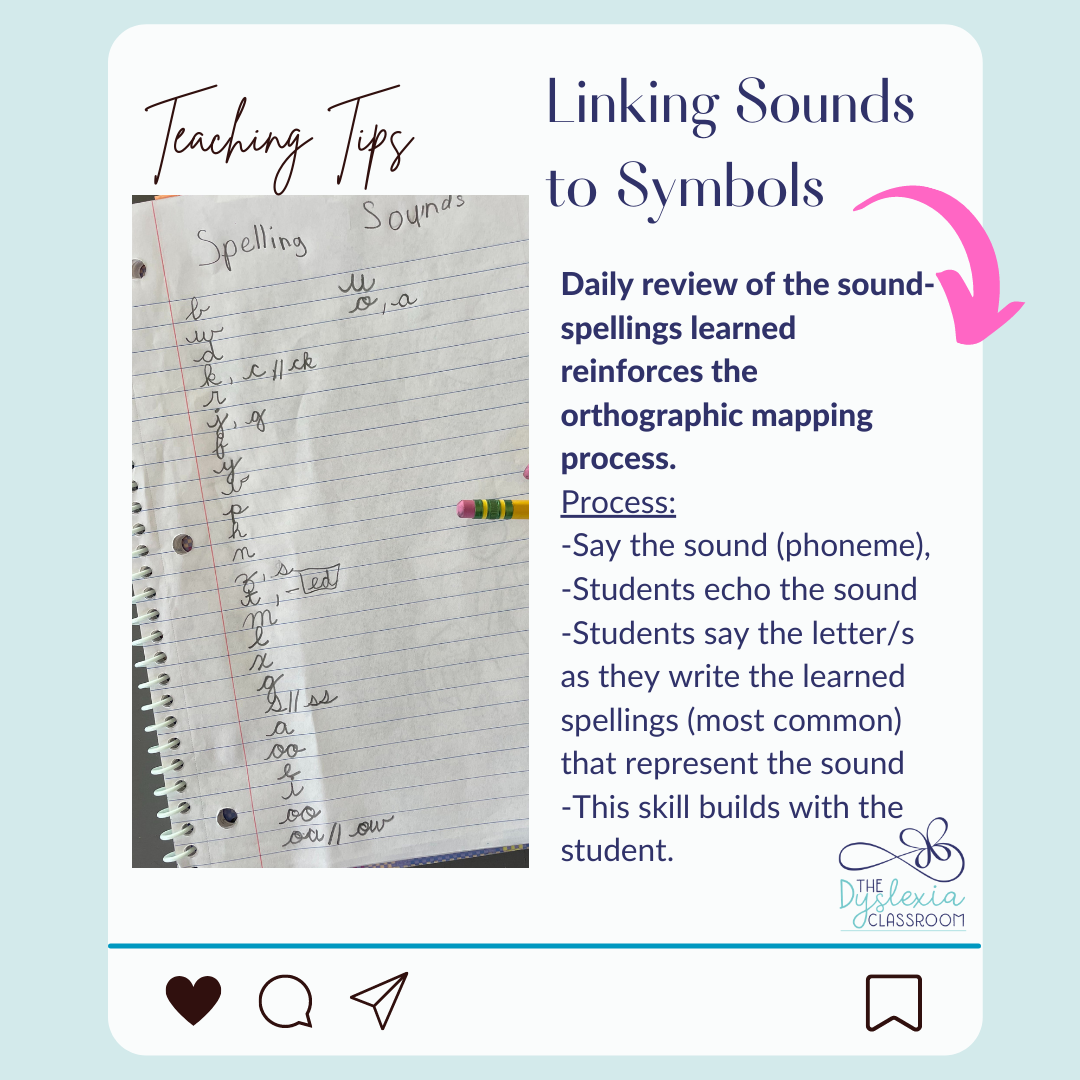
Link Sound to Print
Integrating handwriting instruction with an introduction to letter sounds helps create the linkages between the speech-to-print and connects the phonogram (sound) to the orthography (letter representation) within our writing system. Students can practice their letter formations when linking them to spelling during auditory drills. This is a review of sound-symbol correspondences previously taught in which the teacher says a sound, students echo the sound, and then state the letter name as they write the letter representation. This provides lots of application practice. I discussed auditory drills in more depth in this article.
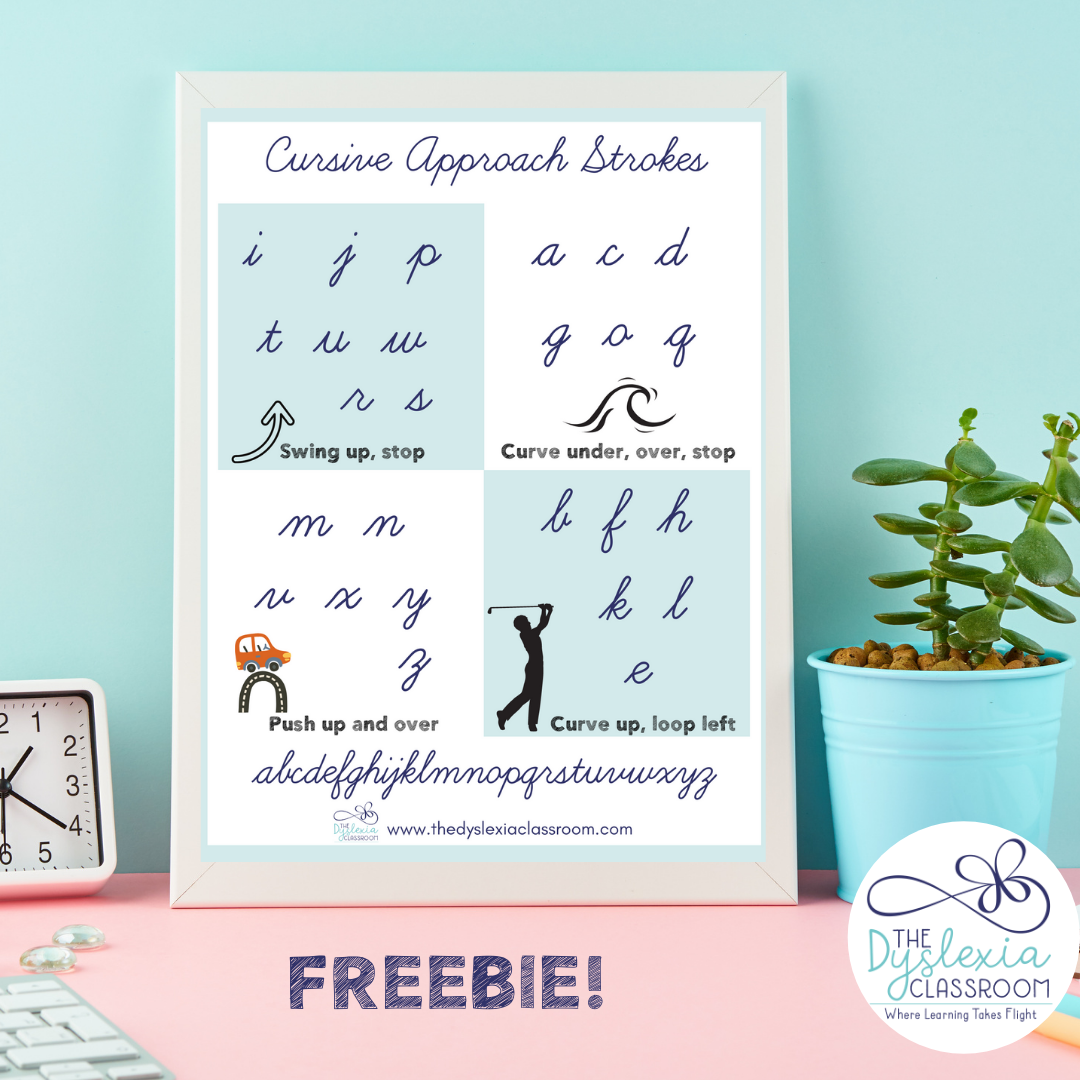
Teach Similarly Formed Letters Together
Grouping letters into four approach strokes makes it more manageable for students and takes away the overwhelming feeling some students may have. My students like that we only have to remember four different ways to begin a letter. In addition, all lower-case cursive letters begin on the baseline or the bottom line. This differs a great deal from print which can start anywhere on the page. I explicitly teach the approach strokes and provide practice of the approach stroke only and then link to a letter.
The four approach strokes in cursive are:
swing up, stop letters: I, j, t, u, w, r, s
curve under, over, stop: a, c, d, g, o, q
push up and over: m, n, v, x, y, z
curve up, loop left: b, f, h, k, l, e
I created the anchor chart shown below for my students that shows the approach stroke groupings. This week, I'm sharing it with you as a free download. Click here, or on the image, to download the poster! You will also be automatically joined in The Dyslexia Classroom community where I share more tips and strategies.
Use Consistent Verbal Cues
The use of verbal cues can assist students when getting stuck in letter production. For example, if a student was working on the approach stroke, curve up, loop left, and she became stuck on h, using the verbal cue can trigger the recall memory. I consistently use verbal cues with my students as we move from approach stroke to letter formation. This repetition assists with recall and provides consistent language as we connect the arm and hand movements to letter formation.

Incorporate Skywriting
Skywriting is when students stand and hold their arm straight out with the opposite hand on their shoulder. The teacher writes a large, 2-3 ft, letter on the board. Students then write the letter on the board in the air, aka skywriting. It's important to note that students must keep a straight arm to feel the large motor movements of the letter formation. The teacher should also provide the verbal cues of the letter as their students skywrite. Then, students can move from the large motor skill of skywriting to a more minor application of letter formation. Skywriting is an effective multi-sensory approach for letter formation practice.
Moving Beyond Individual Letter Practice
Th purpose of cursive writing is to create automatic, fluid handwriting that aids in comprehension and written expression. Students need explicit instruction in the connection of letters in addition to the formation of individual letters. Beirnger, who has conducted longitudinal studies, has found that printing, cursive writing, and typing are all associated with distinct and separate brain patterns. Her research also found that "children wrote more words, they wrote faster and expressed more ideas with paper and pen than with keyboard. Up to about the sixth grade, there does seem to be an advantage for composing and handwriting."
Practice, Practice, Practice!
The more we practice a skill like handwriting, the more automatic we become. Cursive is no different. Students need to be provided with explicit instruction in the approach strokes and then be allowed time to practice!
There are many opportunities to add multi-sensory writing into our lessons. These include paintbrushes and water, writing on vertical surfaces, writing in sand, and pencil and paper. What are some of your favorite ways to weave handwriting instruction and practice into your lessons? Comment below, and let's share ideas.
Don't forget to download your free anchor chart on Cursive Approach Strokes. You can join the community and download it for free here. Share with and tag me on Instagram how you display this free anchor chart. I'd love to see it in your space!
I hope you have a great week!
Casey

This information is the intellectual property of @2016 The Dyslexia Classroom®. Do not use or repurpose without expressed permission from The Dyslexia Classroom®. Please email Casey@thedyslexiaclassroom.com for permission, and give The Dyslexia Classroom® an attribution if you use, reference, or quote/paraphrase copyrighted materials. This includes but is not limited to blogs, social media, and resources.

Hey there!
My name is Casey Harrison
Welcome to The Dyslexia Classroom's blog. I'm a Certified Academic Language Therapist, Dyslexia Therapist, and creator of The Dyslexia Classroom. My passion is to help educators and parents understand their dyslexic learners to help them reach their fullest potential. I'm glad you are here!
Recent Posts

Join The Dyslexia Classroom!
Subscribe to access the freebie library and be the first to know about courses, resources, updates, tips and more!
Categories
All Categories