Let's Talk About Nasals
Hi friends! This week, I'm going to continue our review of the consonant sound groupings. If you're working on implementing a sound wall, or you want to shift how you approach teaching phonics, then this week's post is for you. 😊
Research shows that our brain makes memory traces of sounds by paying attention to mouth formations. When we begin with the sound, we're laying the foundation for knowledge of graphemes, or letters. This anchors our phoneme-grapheme correspondences. In my work with students, I focus on this speech-to-print approach where I explicitly teach phonemes, or those individual speech sounds, to students. I begin by introducing the sound and connection to the mouth formation.
What about those nasal 👃 sounds?
If you haven't heard of nasals, you are not alone. Many programs or trainings may not introduce this concept, but I think you should and here's why. Consonants are usually grouped or taught according to their articulation features, or how the sound is made. These articulatory gestures are grouped by stops, fricative, nasals, affricates, liquids, glides and combinations. If you missed the first few videos, you can check them out HERE and HERE. Nasals are those sounds that are produced with an air stream that's directed through our nose. There's three nasal sounds in the English language, and they differ in placement of our mouth. So let's take a look at these nasals.
Three Nasal Sounds
In the video above👆, I go over all three of the sounds. But, I'll also explain it here.
With m, the sound is produced by pushing our lips together. You can feel that the sound is made at the front of our mouth. The sound is then directed out through our nose. So, you can have your students look at their mirror as they say m, then ask them what their lips are doing. They're closed, right?
So where in the world is the sound coming out of?
You should have your students pinch their nose and try to make the sound. Ah, you cannot produce the sound when the nose is blocked because the air is coming out of our nose. This is why we call m a nasal sound. I refer to this as our front nasal because the sound is being produced at the front of our mouth.
The next nasal is the sound n. Again, look at the mirror, see what's happening with our mouth as we produce n. You want to ask your students "Where is your tongue?" It's been placed at the top of our mouth at the ridge, right behind our teeth. I tell my students, this is in the middle part of our mouth. You can ask them where they think the sound is coming out. They may say their mouth because it's open. You can have them place their hand in front and feel. Do you feel anything coming out? No. So, let's try to pinch our nose. Guess what happens? That's right, the sound cannot be made. Why? Because this is a nasal sound as well.
Next, let's talk about the last nasal sound ng. This sound in isolation can be difficult for both educators and students. It takes some practice and awareness of your mouth to produce this sound. I had to practice a bit when I was first learning. So, take your mirror, open your mouth wide, and drop your chin. You're going to pull your tongue back to the back of your throat and down. You're going to feel that the back of your tongue is going to slide down which is what's blocking the airway. Now say ng. We want to make sure that we're not adding a g sound to the final position. Next, pinch your nose. If you can say ng with your nose pinched, then you need to continue to practice. The sound should be directed through the nose. Again, don't worry, it takes practice. 😉 We also have two spellings for ng, we have digraph ng as in King and rang. And then we have the spelling generalization of ng before k, like in think and zinc.
Some programs might teach these as clusters -ang, -ing, -ong. But, you still want to make sure that we're producing those phonemes correctly. So remember, we want to keep the sound to their purest form and isolation. If you hear an error in sound production with your students, you want to model the sound correctly and have the students echo that sound before moving on.
We always want to bring it back to our mouth features and checking that the airflow is being directed through the nose for those nasals. We also want to follow up with lots of activities where students are identifying the sound and isolation within words and then connecting to reading and spelling.
I hope that this post and video helped a little bit with identifying those nasals and have given you some opportunities to practice. Let me know your thoughts on those nasal sound productions and if you'd like more tips and information about reading and dyslexia.
Be sure to follow The Dyslexia Classroom on Instagram for more tips + strategies!
If you're not part of the community, click here to receive our weekly newsletter and access to the FREE resource library. This week, I'm sharing a simple form to help your students link speech sounds to their letter representations.
I have been using these forms with my students to help them map phonemes to graphemes. I designed them so that I can use them in many different ways.
Here are a few of the ways in which I scaffold instruction with these forms:
- Phonemic awareness segmentation tasks - place a small eraser or chip in each box to represent each phoneme in a word, or have students color a square for each sound
- Spelling dictation - easily move from single sound representations to words
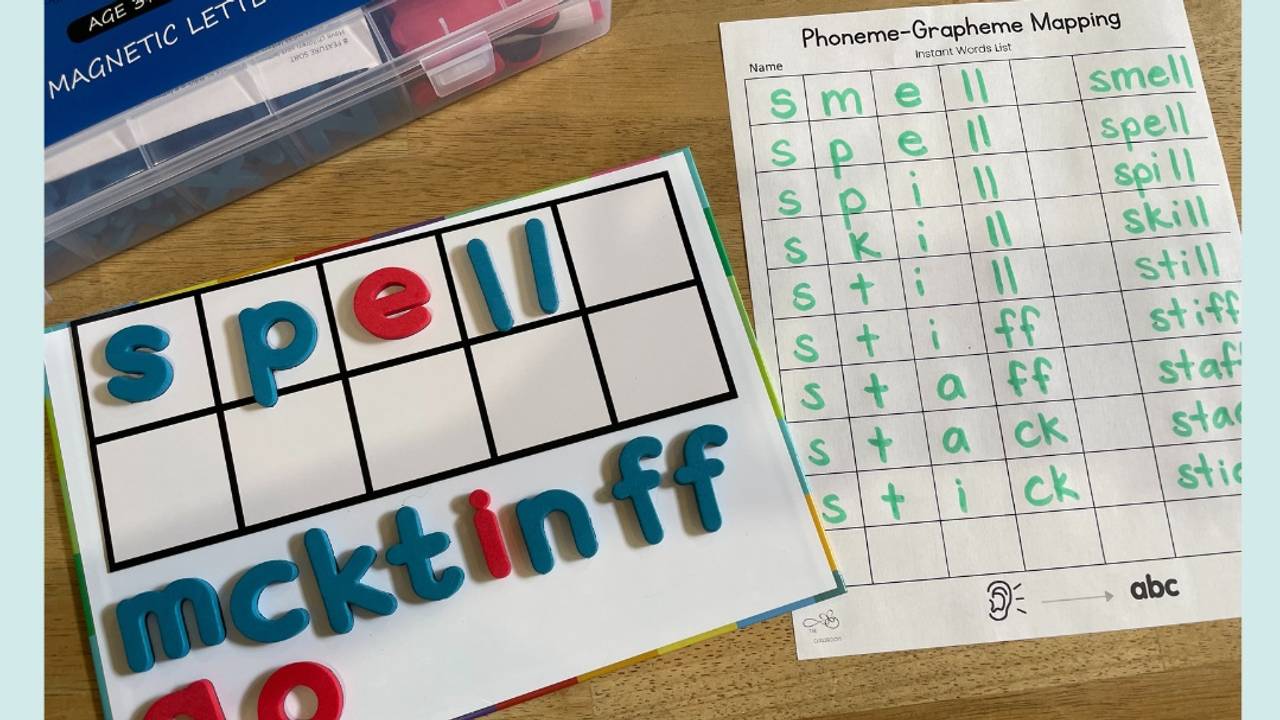
- Spelling words - students segment each phoneme within the word as they mark a box for each sound. Then students map the corresponding grapheme (letter/s) and write them in the box. They then write the entire word in the larger box on the right side of the sheet.
- Word Chaining/Word Ladders - building new words based on the previously taught phoneme-grapheme correspondences and spelling generalizations allows for practice with phoneme manipulation. Prepare the word list ahead of time for smoother lesson delivery. Change one phoneme at a time and students segment, map, and write the new word.
- Word chaining example: smell-spell-spill-skill-still-stiff-staff-stack-stick-stock
Again, click here to get access to the The Dyslexia Classroom Resource Library!
Have a great week!
Casey

This information is the intellectual property of @2016 The Dyslexia Classroom®. Do not use or repurpose without expressed permission from The Dyslexia Classroom®. Please email Casey@thedyslexiaclassroom.com for permission, and give The Dyslexia Classroom® an attribution if you use, reference, or quote/paraphrase copyrighted materials. This includes but is not limited to blogs, social media, and resources.

Hey there!
My name is Casey Harrison
Welcome to The Dyslexia Classroom's blog. I'm a Certified Academic Language Therapist, Dyslexia Therapist, and creator of The Dyslexia Classroom. My passion is to help educators and parents understand their dyslexic learners to help them reach their fullest potential. I'm glad you are here!
Recent Posts

Join The Dyslexia Classroom!
Subscribe to access the freebie library and be the first to know about courses, resources, updates, tips and more!
Categories
All Categories